In this article, we will discuss how to build the infrastructure on AWS to host a static website with the help of AWS Cloud Development Kit aka AWS-CDK. Previously, I have written a blog post on step by step process to do it with AWS console, If you haven't read it yet, I would highly recommend you read it, check out the blog post .
we will be building the same infrastructure with code now. It would be great if you try to build it first through the console, It will help you understand aws-cdk better. As you know, people forget things, and clicking on 1000s of buttons, and making the website live is a tedious process, and like all "Dev Gods" profess
As a lazy engineer myself, I would rather die automating a mouse click, than clicking the mouse myself or the keyboard, I am on the waiting list of Neuralink, waiting for the GOD ELON to allocate one for me, so that i can code even when i am sleeping! Boosting the productivity 100x for the pennies i get paid. Now, let's get into the meat of the matter.
Setup
Before proceeding to code, we will have to setup our local environment with necessary things.
I ain't gonna explain it, Do it yourself, Hit your head sometimes on the table, It will work! , I recommend you use access tokens from AWS to authenticate. you can add token with aws configure commad, I would urge you to leave the region as ''us-east-1" unless you want to debug with super "helpful" error messages from AWS.
Getting started
You are expected to have a website project code on Github, some boilerplate code will do, scaffold any template from here .
Let's start creating the aws-cdk stack.
create a folder and change directory to it.
mkdir cdk-app && cd cdk-app
let's initiate the cdk stack by following command.
cdk init app --language typescript
Let's wait for it to finish, In the mean time

Open your code editor, Let's try to create an SQS Queue and let ourself into the wonderland of aws-cdk. Go to bin/cdk-app.ts and uncomment the following line
env: { account: process.env.CDK_DEFAULT_ACCOUNT, region: process.env.CDK_DEFAULT_REGION },
Go to lib/cdk-app-stack and uncomment the code related to SQS queue.
As we are trying to build a cdk-stack for the the first time, we need to bootstrapp it, you need to do it for each new region where you want to deploy a stack.
run cdk bootstrap and wait for it to finish.
now run cdk synth command, this will create a cloudformation template corresponding to our cdk code. you find the info regarding the sqs queue within that gibberish, Good luck finding it.
Now run cdk deploy , this command will run cdk synth command and try to push the cloudformation template to our aws account. go to cloudformation section on your console, and you'll see the stack is getting created, also check the sqs queue.
Now you can run cdk destroy , to destroy already create the stack. (It is highly unlikely that we will ever do this on a production application, we will mostly update the existing stack)
Now remove the sqs related code from our stack, let's build the stack for hosting our static website.
you will add following lines to the stack, which we will use to configure our website, we are aiming to deploy sites with subdomains with this aws-cdk code.
    const githubOwner = "your-github-username";
    const githubRepo = "your-github-repo";
    const githubBranch = "your-github-main-branch";
    const mainDomain = "example.com";
    const subDomain = "subdomain";
Creating the S3 buckets
If you have read my previous blog post, you'll know that we need two buckets, one to host our website related files and will get pointed by www domain, and another bucket the for redirecting the requests coming from non www version of our website domain.
Creating the main bucket
within the stack class add the following code.
const websiteBucket = new cdk.aws_s3.Bucket(this, "WebsiteBucket", {
blockPublicAccess: {
blockPublicAcls: false,
blockPublicPolicy: false,
ignorePublicAcls: false,
restrictPublicBuckets: false,
},
autoDeleteObjects: true,
websiteIndexDocument: "index.html",
websiteErrorDocument: "index.html",
publicReadAccess: true,
removalPolicy: cdk.RemovalPolicy.DESTROY,
});
As we need our objects to be public we will disable blockPublicAccess, we also need to add a policy for publicReadAccess , we need to mention index document for our website, and we have defined index.html the error document too, so when ever any error occurs, it will just return index.html. If you try to reach any route example.com/about directly, it will end up in error, in order to avoid that i would prefer if you add index.html to be your errorDocument.
we will also set autoDeleteObjects : true , if the stack has to delete the s3 bucket when we destroy that stack, it will have to empty the bucket first. Unless we add these, the cdk destroy , command will throw an error mentioning that the s3 bucket is not empty
Then comes the removal policy, if we try to rename the bucket, a new bucket will get created and the older one will not get deleted. As s3 can store valuable data, you may need to copy that data some where, so it is ideal to not have this option at all. As we are using bucket host a website, and the files are available on git, we can add a removal policy. we don't need to retain the bucket.
Run cdk deploy and create the bucket, It will ask you permission to create resources, policies needed, type y and press enter, you know the drill
Creating the redirect bucket
Add the following code to our stack
const websiteRedirectBucket = new cdk.aws_s3.Bucket(
this,
"WebsiteRedirectBucket",
{
blockPublicAccess: {
blockPublicAcls: false,
blockPublicPolicy: false,
ignorePublicAcls: false,
restrictPublicBuckets: false,
},
websiteRedirect: {
hostName: `www.${subDomain}.${mainDomain}`,
protocol: cdk.aws_s3.RedirectProtocol.HTTPS,
},
removalPolicy: cdk.RemovalPolicy.DESTROY,
}
);
we can define the redirect object, and we specify the address for redirection, we will select HTTPS protocol, If you specify redirect buckets with publicReadAccess : true , It will cause errors while creating the buckets, as both of them have conflicting interests
run cdk deploy to apply the changes
Creating the cloudfront distribution
We cannot let everybody access our s3 directly, as out s3 buckets are sitting in a particular region, the latency will be high for those who access from the other part of the world.
So we will create a cloudfront cdn to distribute our website across the globe. I assume you already have a domain at this point and it is available on Route53 as hosted zone. Make sure to create a public hosted zone.
If you don't have one, create one with the help of internet! once you have hosted zone ready (It might take over 12 hrs to reflect name server changes) . we have 3 things to do.
Get the required hosted zone
create SSL certificates for our www, non-www domains.
add those SSL certificates to the cloudfront
Defining the hosted zone
As our hosted zone is public, we can get the hosted zone with just a lookup, add following code to get the zone details
const hostedZone = cdk.aws_route53.HostedZone.fromLookup(
      this,
      "WebsiteHostedZone",
      {
        domainName: mainDomain,
      }
    );
create SSL certificate for both domains
As we have hosted zone details from lookup, let's create ssl certificate for www and non-www versions of our website, we can define both addresses in a single certificate
const certificate = new cdk.aws_certificatemanager.Certificate(
this,
"WebsiteCertificate",
{
domainName: `www.${subDomain}.${mainDomain}`,
subjectAlternativeNames: [`${subDomain}.${mainDomain}`],
validation:
cdk.aws_certificatemanager.CertificateValidation.fromDnsMultiZone({
[`${subDomain}.${mainDomain}`]: hostedZone,
[`www.${subDomain}.${mainDomain}`]: hostedZone,
}),
}
);
we could have used validation: CertificateValidation.fromDns(zone) , but this methods doesn't automatically create dns validations records on route53, we will be forced to do it manually. fromDnsMultiZone method automatically creates the validation records, thus we don't need to do it manually.
Now run cdk deploy , It might take some time, be patient!
Creating the distributions
we need to create distributions to both of our buckets, add the code below to your stack
const distributionForWebsite = new cdk.aws_cloudfront.Distribution(
this,
"WebsiteDistribution",
{
defaultBehavior: {
origin: new cdk.aws_cloudfront_origins.S3Origin(websiteBucket),
viewerProtocolPolicy:
cdk.aws_cloudfront.ViewerProtocolPolicy.REDIRECT_TO_HTTPS,
},
httpVersion: cdk.aws_cloudfront.HttpVersion.HTTP2,
domainNames: [`www.${subDomain}.${mainDomain}`],
certificate: certificate,
}
);
const distributionForRedirect = new cdk.aws_cloudfront.Distribution(
this,
"WebsiteRedirectDistribution",
{
defaultBehavior: {
origin: new cdk.aws_cloudfront_origins.S3Origin(
websiteRedirectBucket
),
viewerProtocolPolicy:
cdk.aws_cloudfront.ViewerProtocolPolicy.REDIRECT_TO_HTTPS,
},
httpVersion: cdk.aws_cloudfront.HttpVersion.HTTP2,
domainNames: [`${subDomain}.${mainDomain}`],
certificate: certificate,
}
);
We will add s3 origins to both of the buckets, with protocol set to redirect to https , the main distribution will use www address and and will point to main website bucket. and similarly the redirect distribution will use non-www address and will point to redirect bucket.
Users will end up in www version of website, no matter which address they type in the browser, that is why we are keeping both the buckets as well as distributions/
we will also add previously created ssl certificate to both of the distributions.
Now run cdk deploy , It can take several minutes to create the distribution, so please be patient.
Configuring route53 records
we will need to point our www and non-www subdomain to its corresponding distributions, here's how we can do it.
 new cdk.aws_route53.ARecord(this, "WebsiteARecord", {
  zone: hostedZone,
  target: cdk.aws_route53.RecordTarget.fromAlias(
    new cdk.aws_route53_targets.CloudFrontTarget(distributionForWebsite)
  ),
  recordName: `www.${subDomain}`,
});

new cdk.aws_route53.ARecord(this, "WebsiteRedirectARecord", {
  zone: hostedZone,
  target: cdk.aws_route53.RecordTarget.fromAlias(
    new cdk.aws_route53_targets.CloudFrontTarget(distributionForRedirect)
  ),
  recordName: `${subDomain}`,
});
run cdk deploy
Adding Codebuild to the stack
We have to follow 2 steps here
creating a build spec file
I have talked about the build spec file in earlier blog post, so i won't be repeating it here. it is just the replica of the same but with cdk code
add following line to create a buildspec file
 const buildSpecFile = cdk.aws_codebuild.BuildSpec.fromObject({
      version: "0.2",
      phases: {
        install: {
          "runtime-versions": {
            nodejs: 18,
          },
        },
        pre_build: {
          commands: ["npm install"],
        },
        build: {
          commands: [
            "npm run build",
            "aws s3 sync ./dist/ s3://$S3_BUCKET --delete",
          ],
        },
        post_build: {
          commands: [
            "echo 'Build completed successfully'",
            "aws cloudfront create-invalidation --distribution-id $DISTRIBUTION_ID --paths '/*'",
          ],
        },
      },
      artifacts: {
        files: ["**/*"],
      },
    });
Creating the code build project.
Add the following code to the stack
const codeBuild = new cdk.aws_codebuild.Project(this, "codeBuildProject", {
  buildSpec: buildSpecFile,
  environment: {
    buildImage: cdk.aws_codebuild.LinuxBuildImage.STANDARD_7_0,
    environmentVariables: {
      S3_BUCKET: { value: websiteBucket.bucketName },
      DISTRIBUTION_ID: { value: distributionForWebsite.distributionId },
    },
  },

  source: cdk.aws_codebuild.Source.gitHub({
    owner: githubOwner,
    repo: githubRepo,
    webhook: true,
    webhookFilters: [
      cdk.aws_codebuild.FilterGroup.inEventOf(
        cdk.aws_codebuild.EventAction.PUSH
      ).andBranchIs(githubBranch),
    ],
  }),
});
we will add the buildSpecFile we created earlier, now we will choose preferred build image, as our buildspec file is expecting some environment variablesm we will define them, as we already have references to our bucket and distribution in our cdk-code, we can easily pass them, how cool is that!
we will also define the source for our codebuild, we will pass owner, repo, web hook filters is nothing but looking for a push event on the specifiec branch, if the event received matches the criteria, it will trigger a build.
run cdk deploy , you can try running a build from console, it will fail, as we don't have some permissions setup for the codebuild, let's add those.
add following lines to the stack code
websiteBucket.grantReadWrite(codeBuild);
websiteBucket.grantDelete(codeBuild);
distributionForWebsite.grantCreateInvalidation(codeBuild);
distributionForWebsite.grantCreateInvalidation(codeBuild);
as we are deleting the objects from the s3 bucket in the buildspec file, we need to give those permission to code build.
as the post build process we are invalidating the distribution cache, we also need to add permissions for that to the codeBuild resource
run cdk deploy to update the stack with new changes, confirm changes.
Setting up the code pipeline
Add the following code to the website stack. There is twi stages we have to consider. source stage as well as the build stage.
const sourceOutput = new cdk.aws_codepipeline.Artifact();
const buildOutput = new cdk.aws_codepipeline.Artifact();
const pipeline = new cdk.aws_codepipeline.Pipeline(
this,
"WebsitePipeline",
{
pipelineType: cdk.aws_codepipeline.PipelineType.V2,
stages: [
{
stageName: "Source",
actions: [
new cdk.aws_codepipeline_actions.GitHubSourceAction({
actionName: "GitHub_Source",
owner: githubOwner,
repo: githubRepo,
branch: githubBranch,
oauthToken: cdk.SecretValue.secretsManager("my-secrets", {
jsonField: "github_token",
}),
output: sourceOutput,
}),
],
},
{
stageName: "Build",
actions: [
new cdk.aws_codepipeline_actions.CodeBuildAction({
actionName: "CodeBuild",
project: codeBuild,
input: sourceOutput,
outputs: [buildOutput],
}),
],
},
],
}
);
we will have to define artifacts, each of our stages outputs some data, so that it can pass the data to the next stage. we will create two artifacts for now sourceOutput and buildOutput, it will depend on our application how many artifacts we may need.
then we will create two stages , source stage to fetch data from the repo on changes happens to the mentioned branch, we add necessary parameters. we will authenticate the codepipeline workflow with our personal access token with following permissions
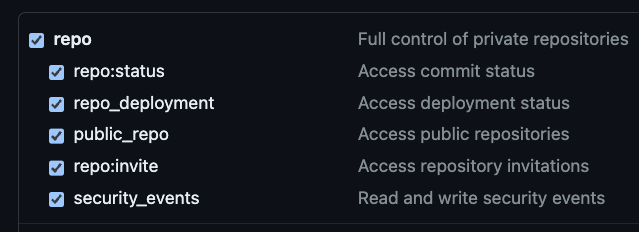
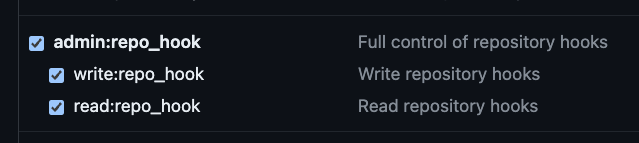
we will add this token to our AWS Secrets manager, we will create a secret called "my-secrets", and add github token as a key, value pair , key github_token and you will add generated token to the value files, you can add many number of key value pairs to this secrets, and you can access it like the following code
cdk.SecretValue.secretsManager("my-secrets", {
              jsonField: "github_token",
        }),
AWS Secret manager is a costly considering it's high availability, encryption, rotation and several other features that make it secure.
It costs around 0.4$ per secret per month, lso it costs 0.05$ per 10,000 requests
It is unsafe to store it as a plain text, anybody who has access to your cloudformation template can see your secrets, that being said if you want to test, you can temporarily use plaintext.
oauthToken: cdk.SecretValue.unsafePlainText("your-github-token")
Under the build stage we will pass the buildOutput artifact, and we will also pass the codeBuild project we created earlier to make code-pipeline know which codebuild project should run.
Let's run cdk deploy , once and for all!
Yay, Our website is now hosted with add the bells and whistles 🥳.
Wrapping up
It has been and interesting project to me. Now i no longer have to click on 1000s of buttons to deploy a new website, just change some variables and host a website in no time. Lot's of time saved.
If you want to destroy the infrastructure you can easily do it with cdk destroy . Life saver! The productivity boost is insane!
We are still deploying things manually, we can setup github actions to run cdk deploy . If you are working in a team, it will be a best practice to create a github workflow for the cdk deploy , so that your peers can review your code before you make any changes to the infrastructure, cause you can break the production if you are not careful! More on it later.
I can't wait to see projects you guys build with this template, You can access the entire cdk code here . If you guys are having any issues do drop them in the comments, i will try my best to answer them.
Do drop your feedbacks and suggestions on blog!
Happy building folks 🛠️